If you’re growing butternut squash for the first time, it’s easy for gardeners to treat it like zucchini. Unlike summer squashes, which are picked at full size while still green for eating fresh or storing in the refrigerator for about a week, butternut squash needs more time. While bright yellow or striped varieties of summer squash are ready earlier, waiting ensures that butternuts develop their full flavor and don’t become seedy or pithy. Knowing when to harvest butternut squash is key to enjoying its peak flavor, allowing it to become a star in your favorite recipes and inspiring you to expand your gardening efforts.
Also, read my guide on:
Honeynut Squash Growing Tips Small Size, Big Flavor
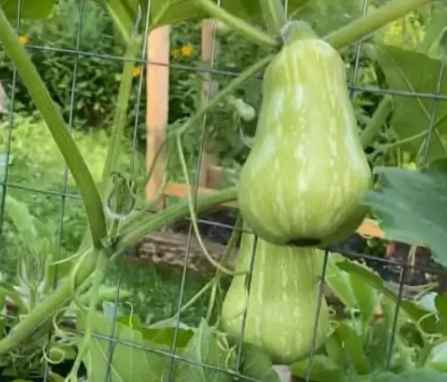
As winter squash, butternuts, like pumpkins, stay in the garden longer to reach their perfect stage. They start as light green fruit, turn dark green, and finally fade to orange as their shell becomes tough and the vines die back. Many first-time growers may worry about the fat squash on the ground, exposed to animals and insects, but there’s no need to rush. Wait until just before the frost to clip the stems and bring them indoors, as they will store well in a pantry for months.
Watching the squash transition through stages and ensuring they are fully ready will make your experience rewarding and your dishes delicious.
When to Harvest Butternut Squash
Knowing when your butternut squash is ready to harvest involves observing key signs. The squash transitions from green to orange, and its rind becomes hard. Additionally, the stem and vines will appear dried or die back. It’s important to check all the boxes before harvesting, but there’s no need to pick the squash immediately. Ensure you collect all your squash before the first fall frost, as it will store longer when not exposed to freezing temperatures.
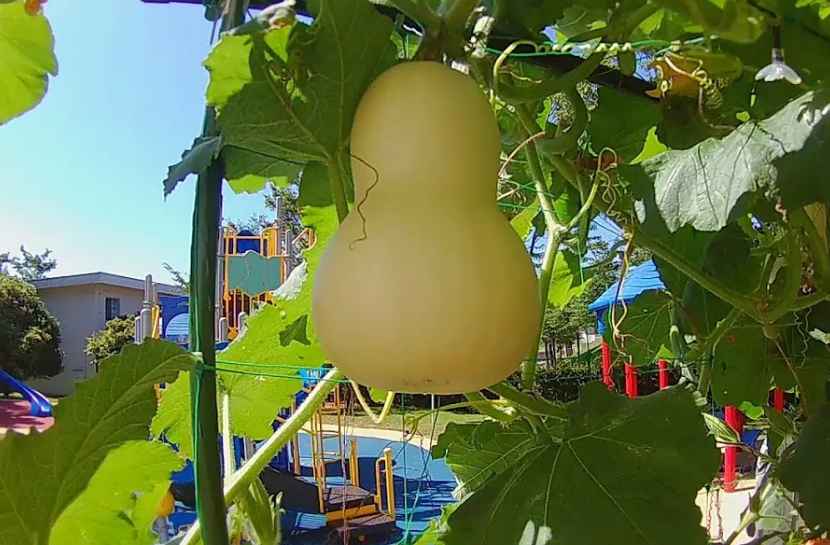
As the squash ripens, its skin changes from a light beige to a deep solid tan, sometimes with bronze or orange highlights. A simple fingernail test can confirm readiness. If scratching the skin leaves a mark or breaks it, the squash needs more time for the rind to harden. Fully ripe squash will have a dull rather than glossy appearance. The vines also offer clues; they become crispy, shriveled, and yellowing, signaling that the plant is dying. However, if the vines remain green, the squash likely needs more time on the vine.
The stem provides another indicator. It should be dry and a uniform tan color, regardless of the variety. By waiting until all these signs align, you’ll ensure your butternut squash is perfectly ripe, flavorful, and ready to be stored for months.
How to Harvest Butternut Squash
Harvesting butternut squash carefully is important, as improper harvests can damage the plant and disrupt your vegetable growing area. Using garden shears, gently clip the stem tips about one to five inches above the mature fruit. Make sure you leave at least 2 inches of the stem intact. Squashes without stems don’t store well and should be consumed immediately. Occasionally, squashes may fall off the vine on their own—this is normal. But keep an eye on them and cook them soon to prevent spoilage.
For winter varieties like butternut squash, a healthy bit of stem is critical to block bacteria that can cause mold and rot. A short stem or damaged squash will store poorly, so take extra care during harvest. Inspect each squash for brown bruises, cuts, or nicks, as these can lead to rot if not addressed. Remove any damaged squash to prevent crop loss, and use these quickly in your favorite dishes. Even unripe tan squash can work well in cooking, so there’s no need to fret if you need to harvest early.
Avoid cutting the stems too close to the vines, harming the plant. You can prune the area to encourage recovery if you accidentally damage the vine. To keep production going, try leaving at least three fruits behind on the vine unless necessary to harvest. This ensures the plant continues to grow healthily and provides more squash.
Following these steps, you can ensure your butternut squash is harvested in peak condition. And ready to store or enjoy fresh, delicious meals. Taking the time to care for your harvest protects the plant and ensures the highest-quality squash for your table.
Curing Butternut Squash
Once harvested, butternut squash needs to be cured to prepare it for long-term storage.
Curing involves placing the squash in a warm, sunny location for 1 to 2 weeks, which helps prolong its storage life.
This process extends the squash’s capability to last by allowing cuts to heal and the skin to harden, preventing bacteria from entering any wounds. Additionally, curing slows down moisture loss, ensuring the squash remains in good condition.
Cured winter squash often develops higher sugar levels, making it perfect for caramelizing when roasted.
The ideal conditions for curing are temperatures between 70–80°F with high humidity, which is easiest to achieve outdoors in the right climate. If you live in cooler temperatures, where nighttime lows may fall below 45°F, move the squash inside until conditions improve.
Squash and pumpkins, as warm-season crops, are sensitive to temperatures below 35°F and should be protected from frost. However, they can withstand brief exposure to cooler temperatures if returned to room temperature soon after to avoid chilling injury.
When the forecast calls for rain, temporarily move the squash indoors and return them to their outdoor curing spot once the rain stops. In areas where chilly weather is common, such as the Midwest or Northeast, there are several alternatives for curing. Use a greenhouse, even an inexpensive plastic one, or place squash near a sunny window indoors. A warm attic can also work but don’t forget about them.
While curing is essential for storing butternut squash, certain types, like acorn squash, should not be cured, as it worsens their quality. This is an important exception to the rule. Proper curing ensures your squash is ready to be eaten or stored, allowing you to enjoy it throughout the season.
Storing Butternut Squash
To store butternut squash, start by ensuring it’s properly cured. Please place it in a cool cellar or area with temperatures between 40 and 50 degrees Fahrenheit for long-term storage. Stack winter squash no more than two deep on a rack to allow proper air circulation. Under these ideal conditions, properly stored squash can last up to six months. If cooler storage isn’t an option, squash can be kept at room temperature on a rack, reducing the storage period to about three months.
Freezing
For even longer storage, freeze harvested squash after preparing it. Peel the skin, cut it in half, and remove the seeds before dicing it into one-inch pieces. Place the diced squash in an airtight glass container or plastic bag and store it in the freezer for up to 8 months. Alternatively, diced squash can be kept in the fridge for about one week, or pureed squash can last 7 to 10 days.
Dehydrating
Dehydrating is another excellent method to extend storage. Dice the squash as you would for freezing and dehydrate it at 145 degrees Fahrenheit for two hours, then reduce the temperature to 110 degrees and dry for another eight to ten hours. The dehydrated pieces should be kept in an airtight container, lasting up to two years.
Freeze-Drying
For the ultimate in long-term storage, consider freeze-drying the squash. This process creates a long shelf life, allowing diced or pureed squash to remain usable for up to 25 years. The condensed sugars from the drying process make the pieces sweeter, adding flavor to meals. Use a freeze dryer to prepare the squash, place the pieces or puree on a tray, and run the machine until the sensor detects dryness. Once dried, store the squash in a mason jar for summer, fall, winter, or spring for years to come.
Choosing the right storage method allows you to enjoy your butternut squash throughout the year, making it a versatile ingredient for all seasons.
Saving Seeds of Butternut Squash
Saving seeds from butternut squash is a great way to ensure you grow open-pollinated varieties with desirable qualities. To save seeds, start with a squash used for cooking. Please don’t cut it open the usual way, as cutting deeply through the squash can damage the seeds. Instead, carefully cut through the top layer and split the squash into halves without harming the seeds.
Remove the stringy pulp around the seeds, placing them in a large bowl of cold water. Swirl the seeds gently to dislodge the pulp, then pour off the pulpy water, keeping the seeds at the bottom. Repeat this process a couple of times until the seeds are clean. Once clean, drain the seeds using a fine strainer and spread them in a single layer on plates lined with paper towels. Please place them in a dry location, away from direct sunlight, for about one week until they are thoroughly dried.
After drying, store the seeds in labeled envelopes in a dry, dark place to prepare them for your next planting season. By following these steps, you’ll have healthy butternut squash seeds with the potential to grow strong, true-to-variety plants.
Also, read my guide on:
Best Vegetables to Grow in a Raised Bed
Final Observations
Harvesting butternut squash at the right time is key to enjoying its flavor and versatility. Observing signs of ripeness, curing properly, and choosing effective storage methods can ensure a long shelf life for this nutritious winter squash. Saving seeds adds an exciting dimension to your gardening, allowing you to grow strong, reliable plants in the next season. Whether you’re storing, freezing, or dehydrating, each step maximizes the value of your harvest, ensuring delicious meals throughout the year while keeping your garden thriving season after season.
FAQs
Q- How do you know when butternut squash is ripe?
It’s ripe when the skin turns tan or orange, the rind is hard, and the stem and vines are dry and shriveled.
Q- How do you know when to pick butternuts?
Pick them when they have a solid tan color, a tough rind, and dry, tan stems before the first frost.
Q- Can you leave butternut squash on the vine too long?
Leaving it too long can cause the squash to over-ripen, crack, or rot, especially if exposed to frost or wet conditions.
Q- When should butternut squash be picked?
It should be picked when fully ripe, typically in late summer or early fall, just before the first frost.
Q- What does butternut squash look like when it’s ready?
It has a deep tan or orange color, no green streaks, a hard shell, and dry, tan stems.
Q- Do butternut squash like sun or shade?
Butternut squash thrives in full sun with at least 6–8 hours of direct sunlight daily.